
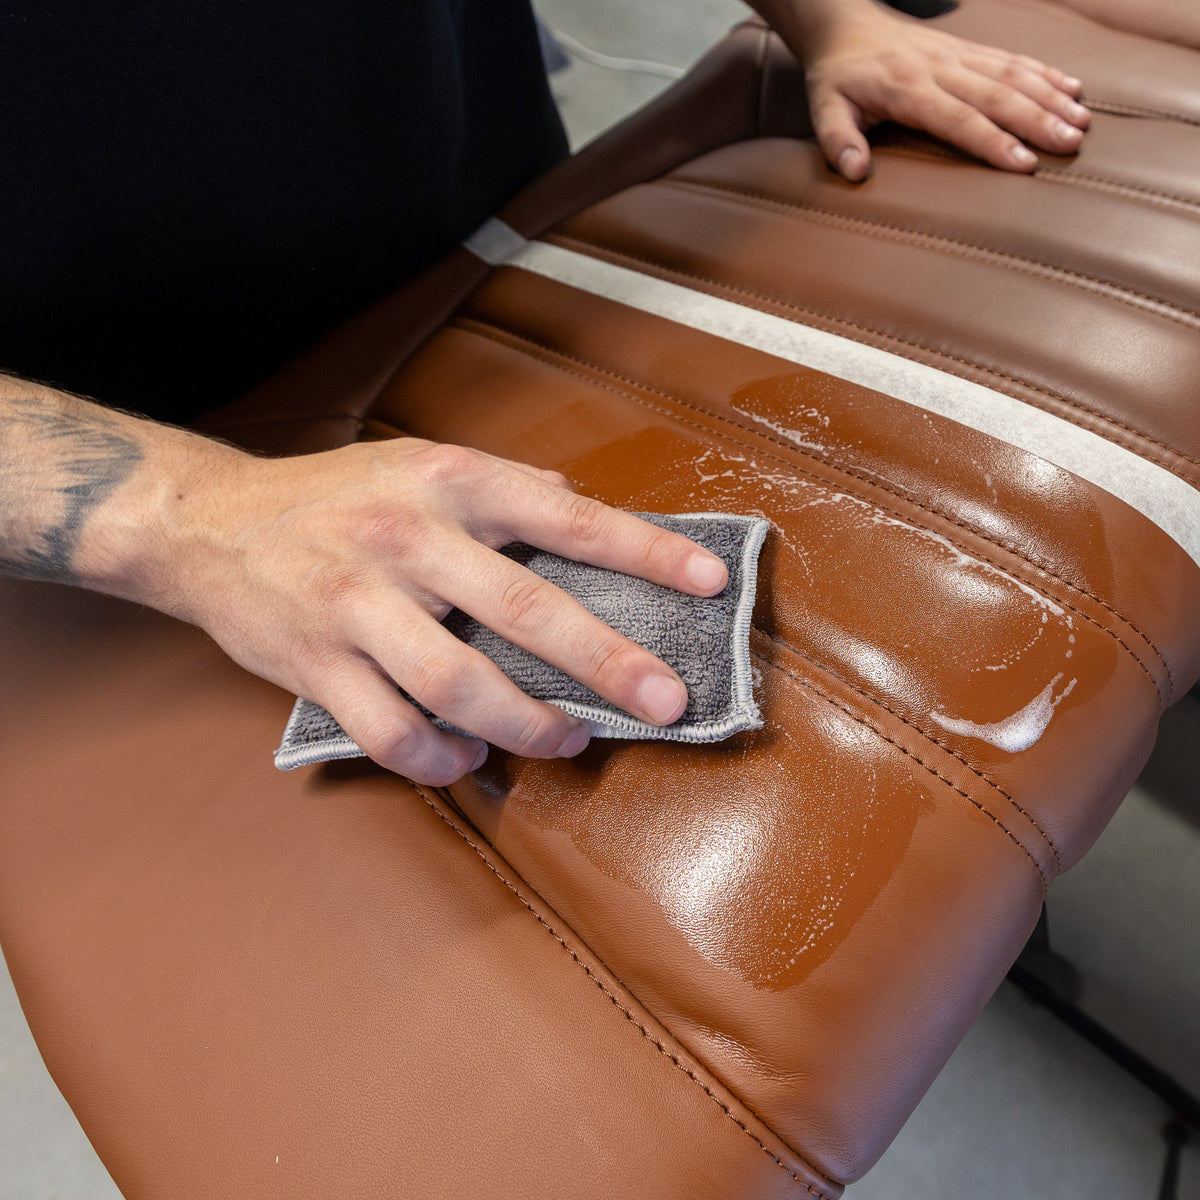
You clean leather seats thoroughly by first removing loose particles, checking the material and then working in a suitable leather cleaner with light pressure. Wipe away the loosened dirt immediately and let the seat dry. On intact, coated smooth leather, controlled cleaning is more effective than vigorous scrubbing with lots of liquid.
Seat bolsters, armrests and frequently touched areas in particular accumulate skin oils and dirt. Light-colored seats also show discoloration especially clearly. We explain how to proceed gently and when an area is no longer just a cleaning issue.
Which leather seats can you clean this way?
This guide applies to suitable, intact, coated smooth leather in vehicles. The visible surface has a protective coating. Smooth leather is not automatically insensitive: its condition, previous repairs and care treatments influence how it reacts to cleaners and friction.
Do not treat open-pore aniline leather, suede and Alcantara according to a general smooth-leather guide. Even similar-looking synthetic leather has its own material requirements. If in doubt, check the vehicle’s equipment instead of guessing the leather type from color or brand names.
Cracks, flaking colour or heavily worn seat bolsters will not be repaired by cleaning. Clarify how to proceed with such areas first. A small test area on intact material helps you assess cleaning performance and compatibility.
What do you need to clean leather seats?
Our Leather Soft Cleaner removes typical dirt and body oils from suitable leather surfaces. You’ll also need several clean, soft microfiber cloths and a suitable cleaning tool. For light soiling, a soft cloth plus a scrub pad or a soft leather brush is often enough.
The professional leather cleaning kit combines the cleaner with a scrub pad. The cleaning side helps to loosen deposits. It is used with cleaner and light pressure, not dragged dry across the leather. Our scrub pad guide explains the tool in more detail.
Prepare separate towels for dirty residues and final wipe-off. Don’t use any towel that still contains polish, sealant or interior dressing. Household scouring sponges and stiff brushes are not suitable alternatives!
Cleaning leather seats in 6 steps
1. Let the seat cool down and vacuum it
Work in the shade and (of course) switch off the seat heating. Remove sand and crumbs with a suitable soft vacuum attachment, including in folds and along seams. Guide the nozzle carefully; a hard edge should not scrape across the leather.
2. Test compatibility
Clean a small, inconspicuous area with the intended combination. Wipe off the cleaner and let the area dry. Check color, gloss, and surface. Noticeable color transfer or a softening coating are clear stop signals.
3. Apply cleaner to the scrub pad
Control the amount of product: The scrub pad/brush should deliver cleaner to the surface without flooding the seat. Especially on seams and perforated areas, heavy direct wetting is unfavorable. Start with a manageable section.
4. Gently loosen the dirt
Spread the cleaner evenly with light pressure. When using a scrub pad, work in a controlled way with its white cleaning side. Pay attention to seat bolsters and edges where the coating may be under greater stress. Do not let the cleaner dry and do not scrub in one spot for too long.
5. Remove residue
Remove loosened dirt and cleaner immediately with a clean microfiber towel. Change the towel side as soon as it becomes dirty. If a cleaning film remains, follow up with a slightly damp, well-wrung towel.
6. Let it air-dry and assess
Let the seat dry without strong heat. Only then check whether there is still dirt present or whether the area remains clean permanently. Use the seat again once it is dry.
Perforated leather, light-colored seats and denim transfer
Do not soak perforated leather
The small perforations make controlled dosing especially important. Apply the cleaner to the tool, work with little liquid and do not press residues into the perforation. Do not clean with steam or a soaking wet pad. Observe the specifications for seat ventilation and the specific upholstery material.
Work evenly on light-coloured seats
On light-colored surfaces you often only see how much buildup was present once the area has been cleaned. Work contiguous sections evenly and check them dry. A bright test area does not automatically mean you’ve removed color; if you notice unusual color transfer or a change in gloss, stop and investigate.
Denim transfer is not always normal dirt
Fresh, superficial discoloration may respond to suitable cleaning. Dyes that have already penetrated cannot be reliably removed this way. If a blue or dark spot remains after careful cleaning, do not experiment with solvents or ever-increasing pressure. Professional stain treatment is then required.
Does the leather need care afterwards?
Cleaning and care serve different purposes. The cleaner removes dirt; a suitable care or protection product is selected to match the leather and the manufacturer’s specifications. Heavy leather grease is usually not the right follow-up treatment for a coated car seat.
Do not apply anything to a still dirty or damp surface. If the seat is clean and the instructions do not call for additional treatment, you do not need to add another product out of habit. Regular removal of loose particles and timely gentle cleaning prevent you from having to work intensively every time.
Frequently asked questions
How often should I clean my leather seats?
According to use and soiling. Regularly remove loose particles and clean more heavily used areas as needed. Frequent intensive cleaning “just in case” is not required.
Can I clean leather seats with dish soap?
We recommend a cleaner specifically designed for the particular leather. The fact that a household product is gentle on your hands does not prove it is compatible with the leather coating.
May I use a scrub pad on leather?
On suitable, intact surfaces and after testing, yes. Work with cleaner, low pressure, and quick wipe-off. On sensitive or pre-damaged material, first choose a softer tool or clarify the application.
Why does the seat still shine after cleaning?
Gloss can come from residues, previous care products or the surface itself. First check it dry. Cleaning is not a method for artificially changing every original level of gloss.
Can I remove scratches and cracks just by cleaning?
No. Such damage requires appropriate repair or refinishing. More cleaner cannot replace missing paint or coating.

Lämna en kommentar
Alla kommentarer granskas innan publicering.
Denna webbplats är skyddad av hCaptcha och hCaptchas integritetspolicy . Användarvillkor gäller.